IFTTT Webhooks linkage
"IFTTT" is a web service provided by IFTTT Inc. that links various web services together. https://ifttt.com
- Web services that support IFTTT can be linked together via IFTTT (recipe registration).
- By setting the Webhooks Event Name (arbitrary string) of the recipe registered with IFTTT to ACUAH, you can control smart remote controls, etc.
On this page, we will explain an example of setting up an action to turn on the TV from ACUAH using SwitchBot (smart remote control) that supports IFTTT.
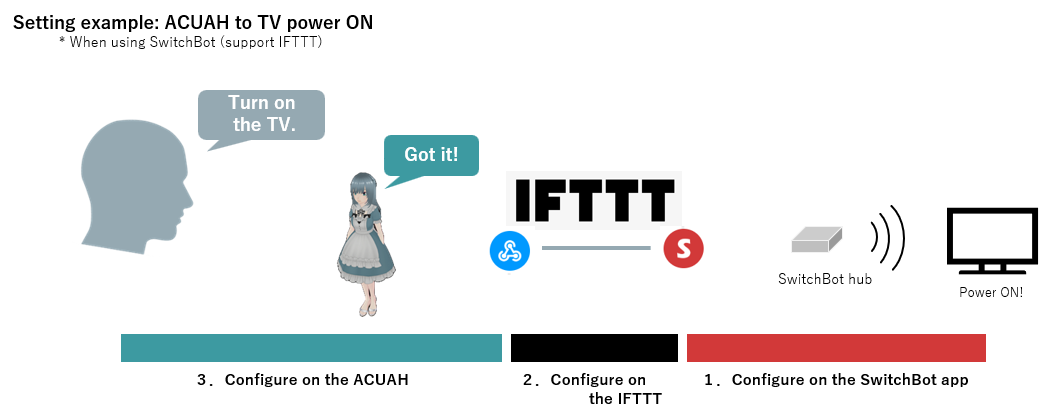
1. Configure on the SwitchBot app
- For details on how to set up the SwitchBot app, please see the SwitchBot Hub manual.
- Set up your SwitchBot to work as a TV remote control by configuring its Wi-Fi settings.
- In the example on this page, the SwitchBot app is set up to perform the "Turn on TV" operation under the "Scene" tab.
2. Configure on the IFTTT
- Access the IFTTT page.
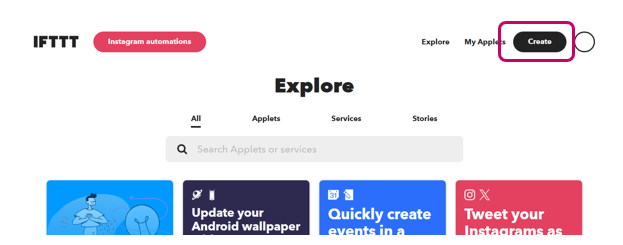
- Click "Create" in the top right of the screen.
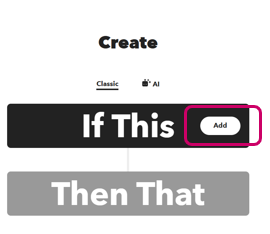
- The "Create" screen will appear, so click "Add" to the right of "If This".
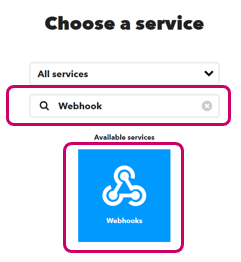
- The "Choose a service" screen will appear, so enter "Webhook" into the search bar (the box with the magnifying glass icon).
- "Webhooks" will appear at the bottom of the screen as shown in the image, so click on it.
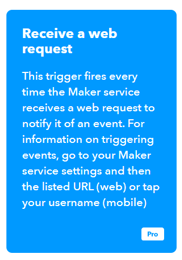
- Click "Receive a web request".
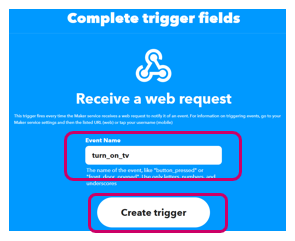
- The "Receive a web request" screen will appear.
- In the "Event Name" field, enter "turn_on_tv".
This turn_on_tv string will be set in ACUAH.
- Click "Create trigger".
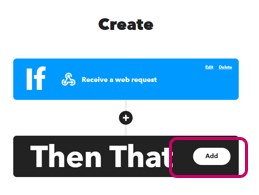
- The "Create" screen will appear again. The "If" section at the top has been set and is now in light blue (Webhooks: Receive a web request).
- Click the "Add" button to the right of "Then That" at the bottom.
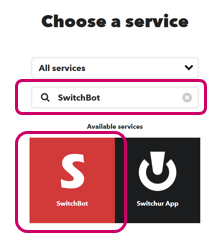
- The "Choose a service" screen will appear again, so enter "SwitchBot" in the search bar.
- A red square with "S SwitchBot" will appear at the bottom of the screen, so click on it.
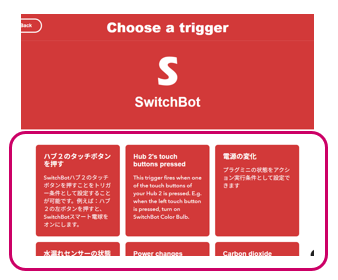
- A list of the various events (actions) registered in SwitchBot will be displayed.
- Select the action you set in "1. Configure on the SwitchBot app" from the list.
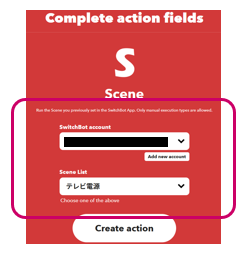
(In this example, we have set "Scene", so we are clicking on "Scene" here.)
- Click on "Create action".
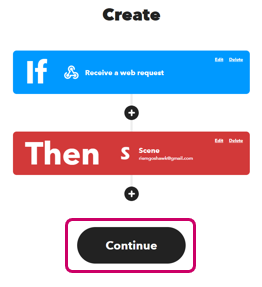
- The "Create" screen will appear again.
- Check that "If" is set to Webhooks and "Then" is set to SwitchBot, and then click the "Continue" button.
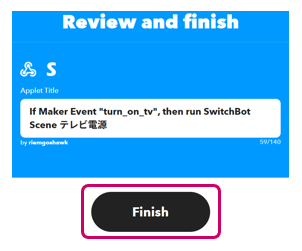
- The "Review and finish" screen will appear, so click the "Finish" button.
Checking the Webhooks key
When sending a trigger from ACUAH to Webhooks, you will need a key (a string of characters) that has been assigned to each user. This is set in ACUAH, so check it and make a copy.
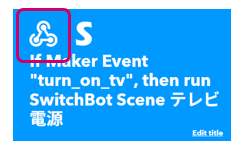
- Click on the Webhooks icon in the top left of the created action.
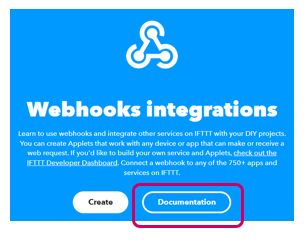
- The "Webhooks integrations" screen will appear, so click on the "Documentations" button.
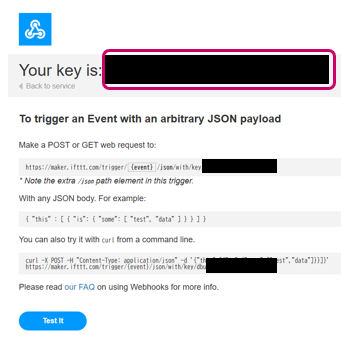
- The message "Your key is:" will be displayed, so select and copy the string of characters after the ":" (the string of characters enclosed in the red box in above image).
3. Configure on the ACUAH

- On the Configuration menu 3, make the settings as shown in the image.
- To add a voice recognition string, tap the microphone icon and say something like "Turn on the TV!" to register the string.
- Select "IFTTT" for "Function".
- Paste the copied Webhooks key into the "Key" field.
- In the "Event Name" field, enter the string turn_on_tv that you set up in IFTTT.
- It is fine to leave the Extra data value1~value3 fields blank.
- Tap the "Test" button to send a test event.
- If the trigger is sent without a problem, the message "Congraturations!" will be displayed in the message window.
If the settings for 1. Configure on the SwitchBot app and 2. Configure on the IFTTT are correct, the TV will turn on with this test.
Please wait a moment after clicking the Test button, as it may take some time for the TV to turn on.
IFTTT is compatible with a variety of services other than SwitchBot, so please try connecting ACUAH with various services.