Character display screen
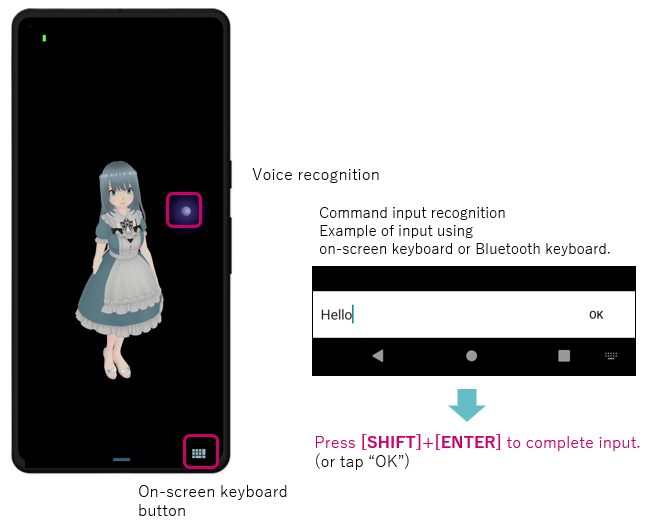
Voice recognition and command input recognition
The following is the condition that the character must be displayed.
The purple sphere icon appears to the right side of the character when voice/command input recognition begins.
- display・dimly glowing - Voice recognition and command input should be performed.
- display - Please wait for the character to automatically start voice recognition and command input.
1. Voice recognition
-
There are three ways to initiate voice recognition.
- Tap the character

- Press the "Play/Pause" button on the Bluetooth multimedia remote controller.
- Press the [SHIFT] key on the Bluetooth keyboard.
2. Command input recognition
![]()
If you do not wish to speak through voice recognition, command input from a Bluetooth keyboard is also supported.
- Press the [CTRL] key on the Bluetooth keyboard.
When using a Bluetooth keyboard, whether the software keyboard is displayed or not is determined by the
Settings > System > Language & input > Physical keyboard
You can change it in "Show on-screen keyboard". (In the case of Android 12)
In the example on the right, on-screen keyboard is in the "none" state.
Information icons
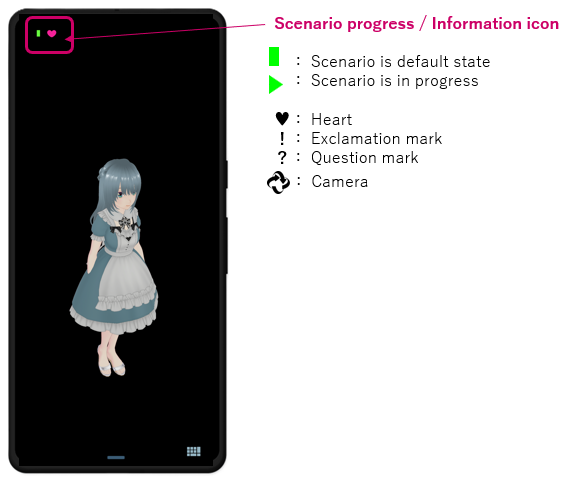
Icons that represent character states and the dialogue scenario transition states are displayed.
The dialogue scenario transition state
Indicates the dialogue scenario transition state.
- ■ - Initial scenario
- ▶ - Scenario is in a transition state
The color of the icon indicates whether it is in the learning state.
- Green - Normal state
- Light blue - Learning state.Please see "About reaction learning".
1. Heart
- Affection/Emotion value +
2. Exclamation mark
It is displayed when the character is surprised.
- Affection/Emotion value -
3. Question mark
-
It is displayed when the character does not understand a word. (Please refer to "About reaction learning".)
If it appears in yellow, the dialogue scenario will return to the initial state.
4. Camera
- It is displayed when the camera is in the camera setting mode.
AI(LLM)/Voice API
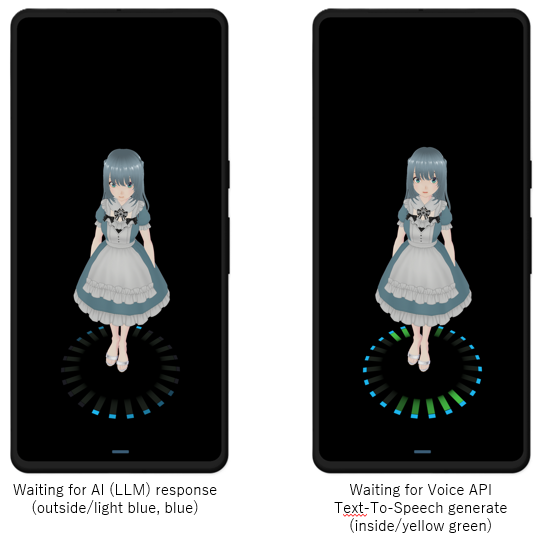
A progress indicator is displayed at the bottom of the screen during the AI(LLM)/Voice API response process: blue for LLM processing and green for Voice API voice data generation. Please note the color of the indicator as it may take some time to respond depending on the load status of the external server.
Background setting
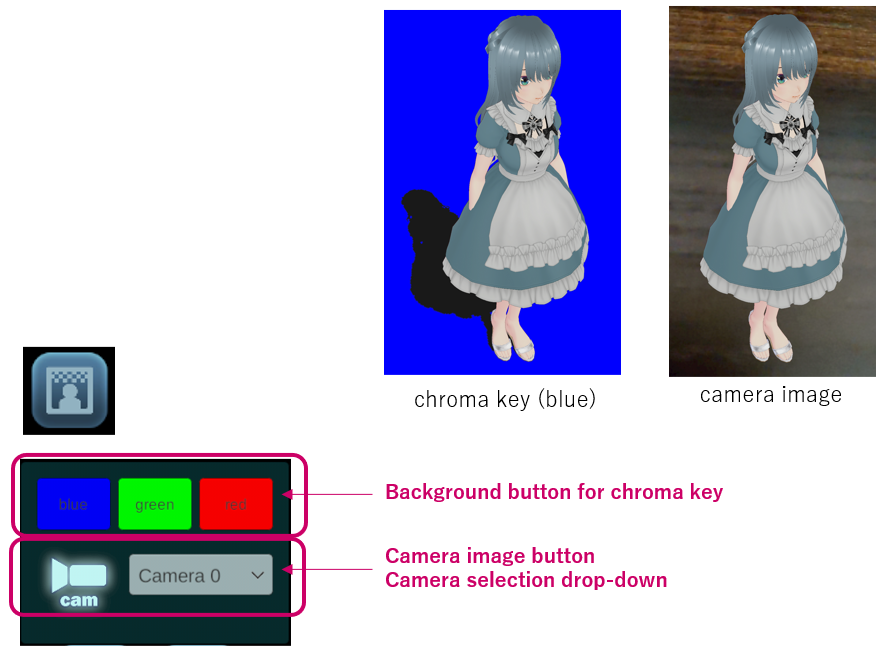
Tap the Background button then setting window will appear.
1. Background button for chroma key
- Background colors (blue, green, red) are available.
2. Camera image button/Camera selection drop-down
-
The camera image from a smartphone can be used as a background.
-
After selecting a camera from the drop-down list on the right, tap the camera image button.
After setting the background, if you want to return the background to its original state (black), use the tap the background button again.
Lighting settings
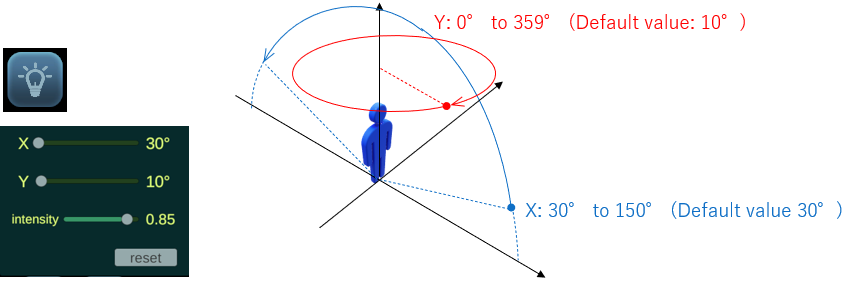
Tap the lighting settings button to display the window shown at left.
Set the light position (X, Y) and light brightness (intensity).
1. X, Y
- You can change the position of the light (illumination) with the coordinates shown in the figure below centered on the character.
2. Intensity
- Light brightness (intensity). 0.00 to 1.00 (default: 0.85)
3. Reset
- Reset lighting settings to default.
Tap the lighting settings button again to close the window. The settings are also saved when the window is closed.
Effect settings
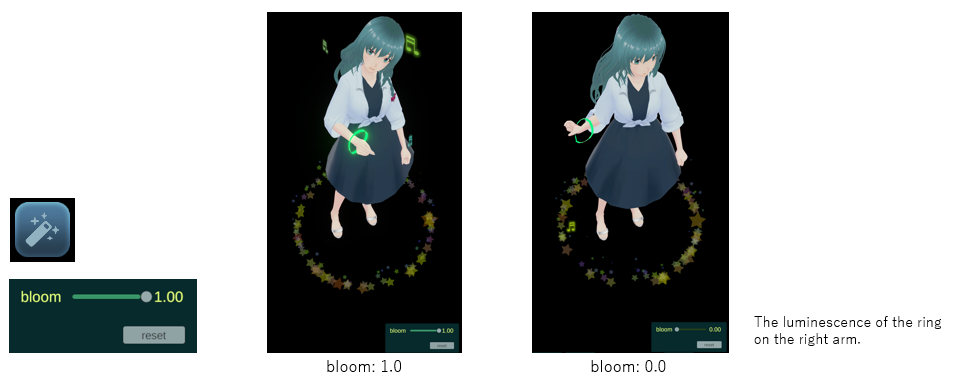
Tap the effect setting button (effect), and a effect window on the left will appear.
If the character model includes a Bloom (effect that makes the parts glow), you can set its luminous intensity.
Smartphone processing load increases when emitting light.
Camera settings
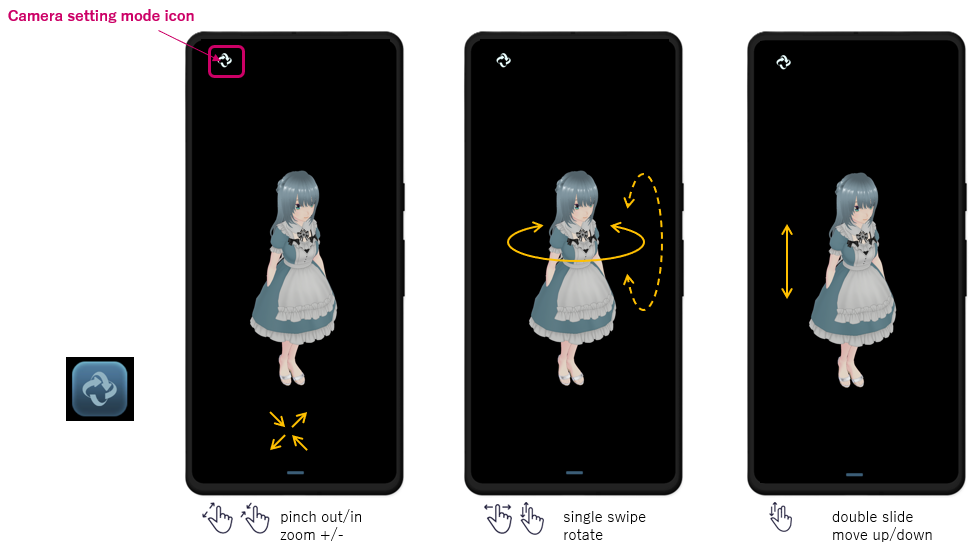
Tap the camera settings button to display the camera icon in the upper left corner of the screen.
Pinch out and in, swipe, and multi-slide (swipe up and down with two fingers) to zoom in/out, rotate, and move the character model position up/down. After completing the settings, tap the camera settings button again, the camera icon will turn red for a moment and the settings will be saved.
You can change camera settings while playing music or dancing.
When "Tilt character in conjunction with gyro sensor" is checked in setting screen 1, the vertical angle of the character model cannot be adjusted by swiping up and down. Please adjust the tilt of the character by changing the tilt of your smartphone.
Real world screen
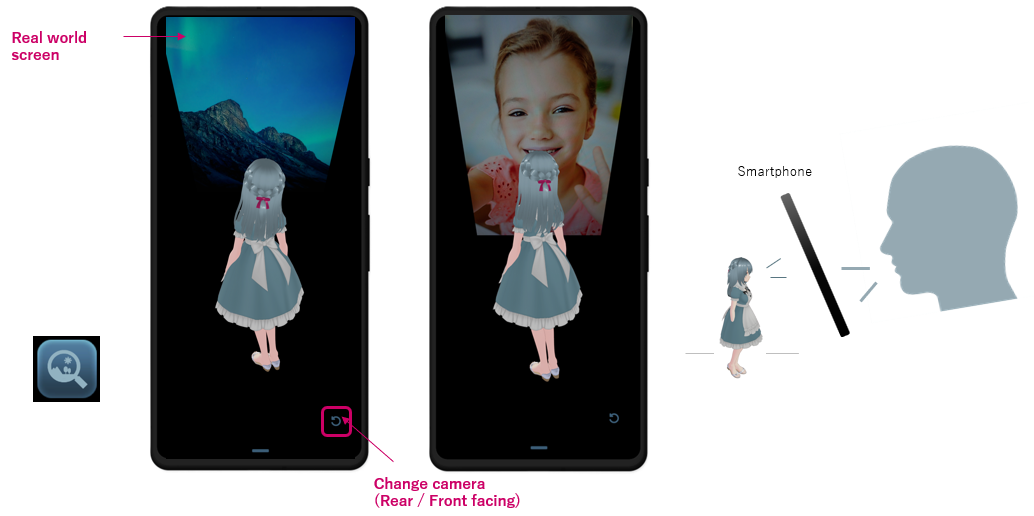
Tap the button to move the camera to the rear side of the character. You will see a screen showing the real world for the character. Tap the camera switch button to switch between rear and front cameras.
The screen showing the real world screen will be displayed based on the tilt of the smartphone at the time the button is tapped. You can also tap the camera settings button above to view the screen and characters from a different angle, but please note that the position of the screen will not automatically change.
The screen reflecting the real world (real world) will only function to display the screen, so you can talk with the character while the screen is displayed. Please tap the character as usual to perform voice recognition or command recognition.